| | Whitebrow's 65 Bug Full Restoration |  |
|
+9Mr Scoops Big_Al Shorty vwroadster joker 67 tango_van WizBizMartin Wurz whitebrow83 13 posters |
|
| Author | Message |
|---|
whitebrow83
Blitzen Regular

 Number of posts : 126 Number of posts : 126
Age : 41
Registration date : 2013-05-22
 |  Subject: Re: Whitebrow's 65 Bug Full Restoration Subject: Re: Whitebrow's 65 Bug Full Restoration  Fri Nov 29, 2013 1:21 pm Fri Nov 29, 2013 1:21 pm | |
| Right 4 cutting discs later and the body is free from the pans! Hopefully get the engine out this weekend.  | |
|
  | |
whitebrow83
Blitzen Regular

 Number of posts : 126 Number of posts : 126
Age : 41
Registration date : 2013-05-22
 |  Subject: Re: Whitebrow's 65 Bug Full Restoration Subject: Re: Whitebrow's 65 Bug Full Restoration  Mon Dec 02, 2013 1:26 pm Mon Dec 02, 2013 1:26 pm | |
| Felt like I made some good progress on Saturday as Rich helped me with removing then engine. Seemed to go smooth until it slipped off the jack and we found out it only had 3 bolts holding it in. Typical. Had a good chat with Joker (Andy) who gave some good advice on panel choice and fitting. Here's some pics (obviously engine needs some work).  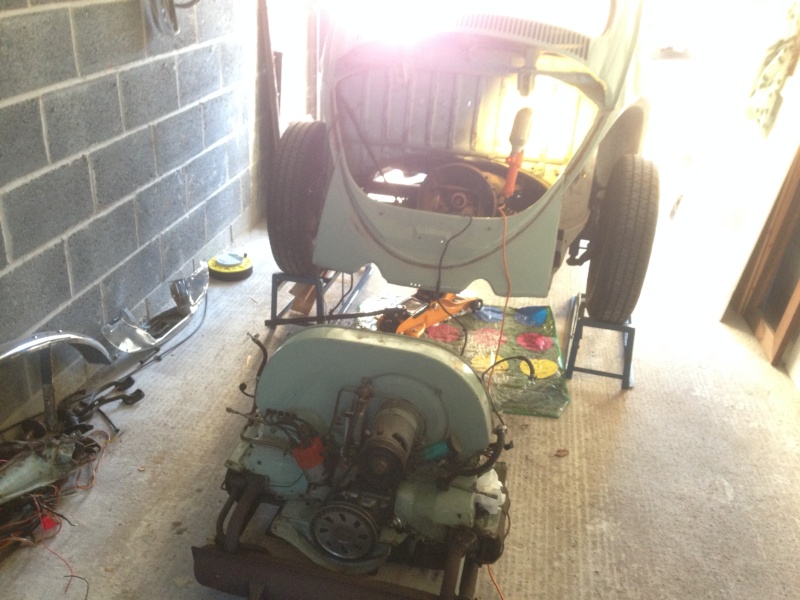 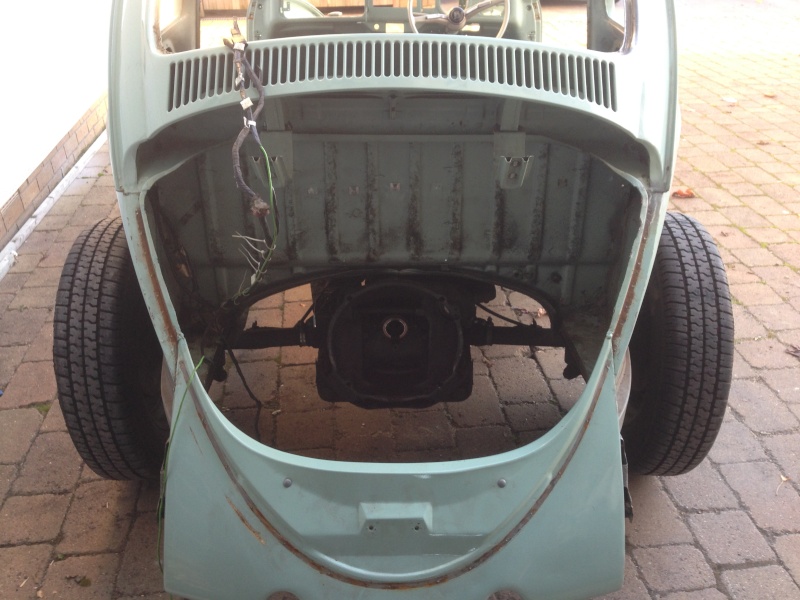 I was very surprised with the firewall as I thought it would be rotten as the previous owner had covered it up with shitty tinware. Although the engine trays and rear sections need replacing due to be rotten and covered up with a dodgy patch. 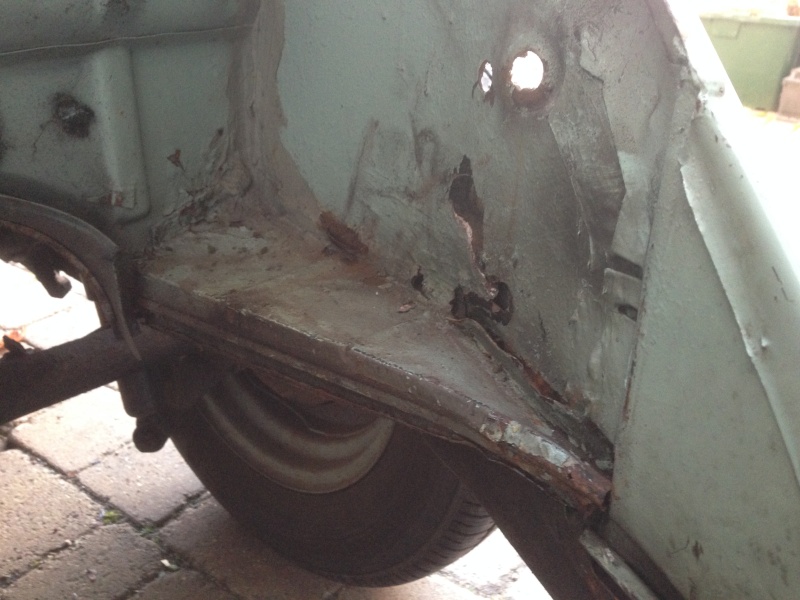 | |
|
  | |
whitebrow83
Blitzen Regular

 Number of posts : 126 Number of posts : 126
Age : 41
Registration date : 2013-05-22
 |  Subject: Re: Whitebrow's 65 Bug Full Restoration Subject: Re: Whitebrow's 65 Bug Full Restoration  Mon Dec 02, 2013 1:30 pm Mon Dec 02, 2013 1:30 pm | |
| Looking at those trays, looks like the previous owner welded them incorrectly as they dont line up with the rear valance seal runner.
Looks odd to me! | |
|
  | |
vwroadster
Blitzen Regular


 Number of posts : 337 Number of posts : 337
Age : 67
Location : Portishead
My Ride(s) : Wizard Roadster
Registration date : 2007-03-15
 |  Subject: Re: Whitebrow's 65 Bug Full Restoration Subject: Re: Whitebrow's 65 Bug Full Restoration  Mon Dec 02, 2013 9:03 pm Mon Dec 02, 2013 9:03 pm | |
| Has the rear valance been replaced?
I found with a replacement I bought, the channel didn't line up with the original side trays, it sat lower like yours does at the rear. | |
|
  | |
whitebrow83
Blitzen Regular

 Number of posts : 126 Number of posts : 126
Age : 41
Registration date : 2013-05-22
 |  Subject: Re: Whitebrow's 65 Bug Full Restoration Subject: Re: Whitebrow's 65 Bug Full Restoration  Mon Dec 02, 2013 9:08 pm Mon Dec 02, 2013 9:08 pm | |
| Thats what I was thinking mate. I has holes between the notched for the exhausts so im 99% sure its a replacement.
What did you do to sort it? | |
|
  | |
clockwork
DBS Top Sphincter


 Number of posts : 7198 Number of posts : 7198
Age : 52
Location : Wouldn't I like to know
My Ride(s) : Rollercoaster
Registration date : 2009-08-09
 |  Subject: Re: Whitebrow's 65 Bug Full Restoration Subject: Re: Whitebrow's 65 Bug Full Restoration  Mon Dec 02, 2013 11:21 pm Mon Dec 02, 2013 11:21 pm | |
| - whitebrow83 wrote:
What did you do to sort it? Just a guess but going from the profile picture and user name I'd say he sacked the whole lot off and replaced it with fiberglass  | |
|
  | |
vwroadster
Blitzen Regular


 Number of posts : 337 Number of posts : 337
Age : 67
Location : Portishead
My Ride(s) : Wizard Roadster
Registration date : 2007-03-15
 |  Subject: Re: Whitebrow's 65 Bug Full Restoration Subject: Re: Whitebrow's 65 Bug Full Restoration  Tue Dec 03, 2013 6:51 pm Tue Dec 03, 2013 6:51 pm | |
| Didn't do it on the Wizard (I didn't build it and it's a steel rear valance).
The options could be to sit a replacement in position (if replacing) and work out if it does need modifying. (As below)
Or if keeping the original see if you can slice (horizontally on the inside, approx. 25mm or the difference) a section out and move the inner piece up to match the channel on the side trays. Quite a bit of work but should see a better seal of your engine compartment keeping the hot exhaust heat separate from the intake. | |
|
  | |
whitebrow83
Blitzen Regular

 Number of posts : 126 Number of posts : 126
Age : 41
Registration date : 2013-05-22
 |  Subject: Re: Whitebrow's 65 Bug Full Restoration Subject: Re: Whitebrow's 65 Bug Full Restoration  Fri Dec 06, 2013 7:13 pm Fri Dec 06, 2013 7:13 pm | |
| Got a delivery of the Wolksburg 18 gauge passenger side pan this week. I have to say, thanks to Joker for recommending this one as it fits perfect, looks an exact replica of the original i removed. Heres some photos of a test fit.   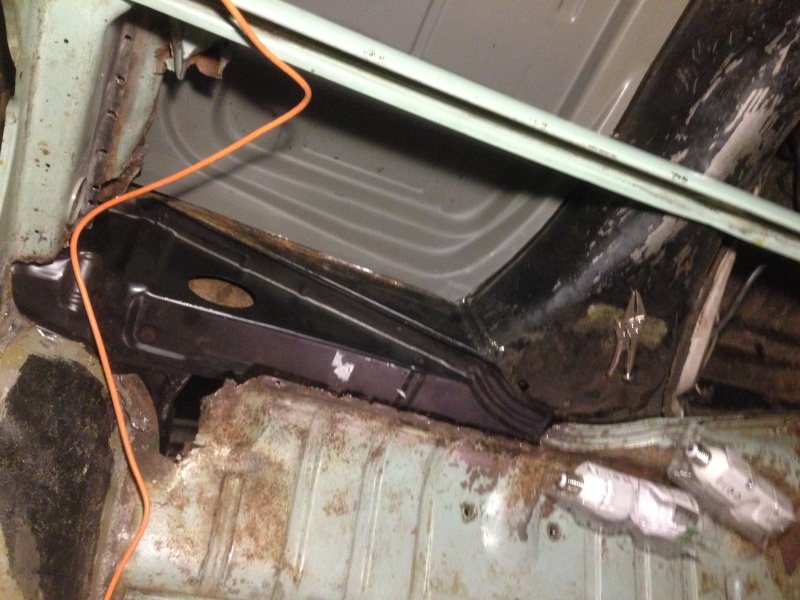 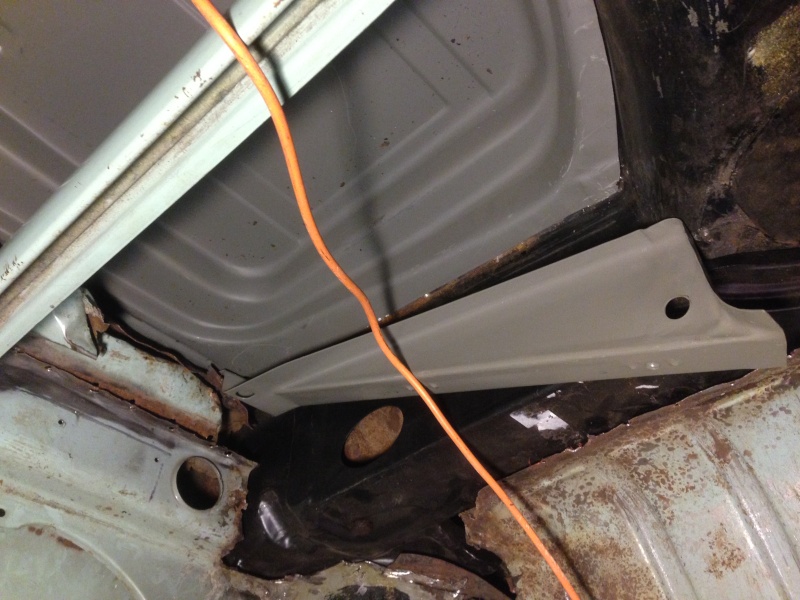 It didnt need any alterations and just fitted like a glove. I put some of the bolts back in even though the heater channel is shot and they fitted bang on. So chuffed with it. Just need to make sure I get good heater channels as well.  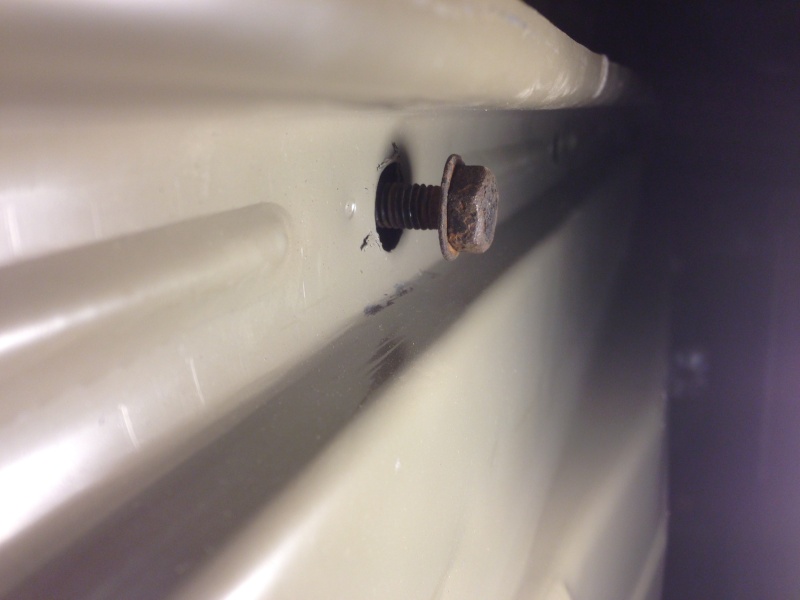 I need to drill spot weld holes in the pan. Ive seen a few videos where people say 2 inches apart. Is that correct and how far from the edge do each hole need to be? | |
|
  | |
joker 67
DBS Old Timer


 Number of posts : 3498 Number of posts : 3498
Age : 54
Location : Clevedon
My Ride(s) : 2018 Skoda Karoq edition and something else
Registration date : 2008-02-11
 |  Subject: Re: Whitebrow's 65 Bug Full Restoration Subject: Re: Whitebrow's 65 Bug Full Restoration  Fri Dec 06, 2013 10:46 pm Fri Dec 06, 2013 10:46 pm | |
| Every inch for a spot weld, 8mm hole. Make sure all is clean, good ally weld through primer, not zinc primer. As zinc is no good for mig.
Get x-member in first.
| |
|
  | |
whitebrow83
Blitzen Regular

 Number of posts : 126 Number of posts : 126
Age : 41
Registration date : 2013-05-22
 |  Subject: Re: Whitebrow's 65 Bug Full Restoration Subject: Re: Whitebrow's 65 Bug Full Restoration  Sat Dec 07, 2013 9:57 am Sat Dec 07, 2013 9:57 am | |
| Cool, will get the pan sorted this weekend. I have another question. Do I try and save as much of the floor plate as possible as half of it and 90% of the lip that the pan sits on is rusted?  Or just replace it with the one that came with the pan. | |
|
  | |
whitebrow83
Blitzen Regular

 Number of posts : 126 Number of posts : 126
Age : 41
Registration date : 2013-05-22
 |  Subject: Re: Whitebrow's 65 Bug Full Restoration Subject: Re: Whitebrow's 65 Bug Full Restoration  Sat Dec 07, 2013 4:56 pm Sat Dec 07, 2013 4:56 pm | |
| Ok today i removed the floor plate on the n/s making sure i made measurements and a few notches to show where points are. I tried to save some of it but realised it was too rusty to save. 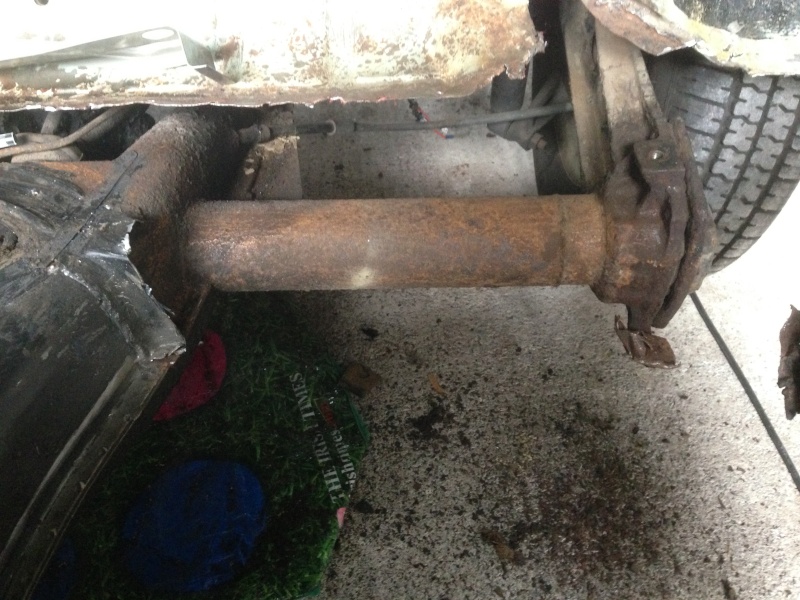 I then started to drill the floor pan. I broke my 8mm drill bit so used 7mm every inch andjust over 1/4 inch away from the edge. 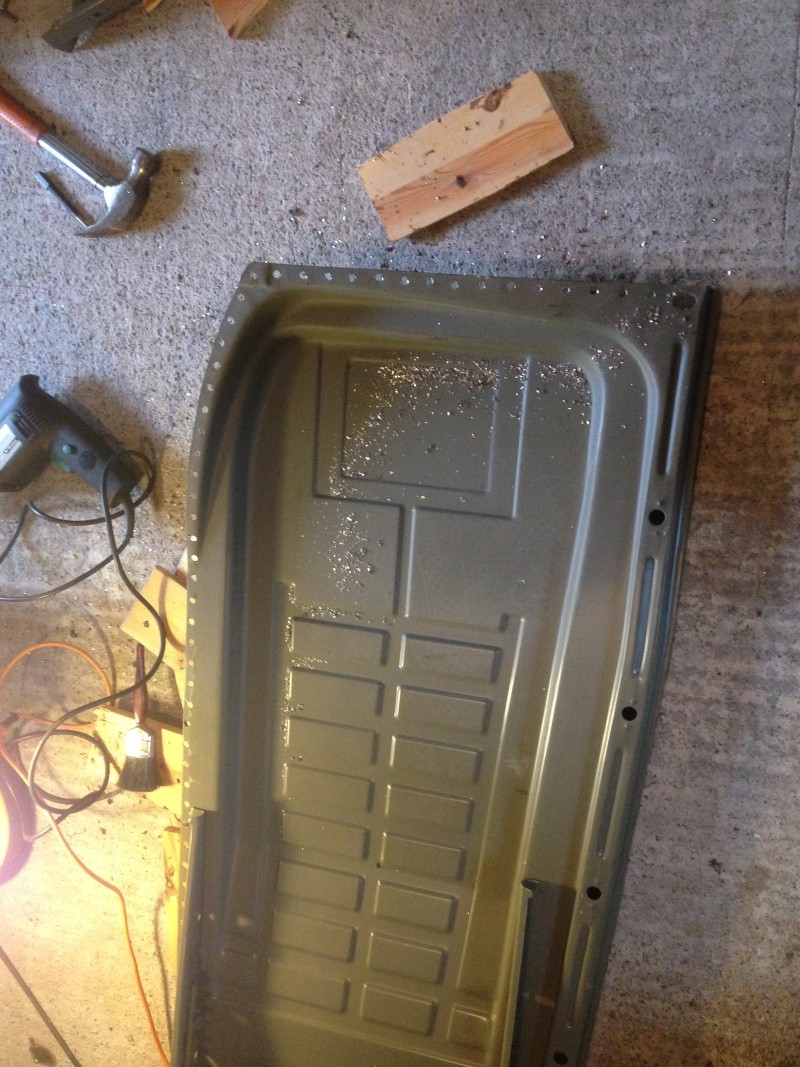 I then checked the positioning of it before I removed the last part of the floor plate. 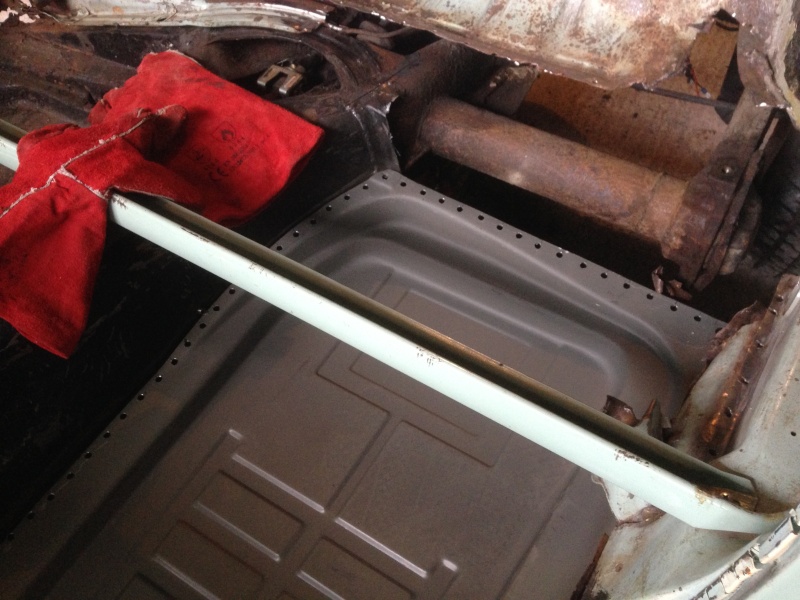 I then cleaned everything up. 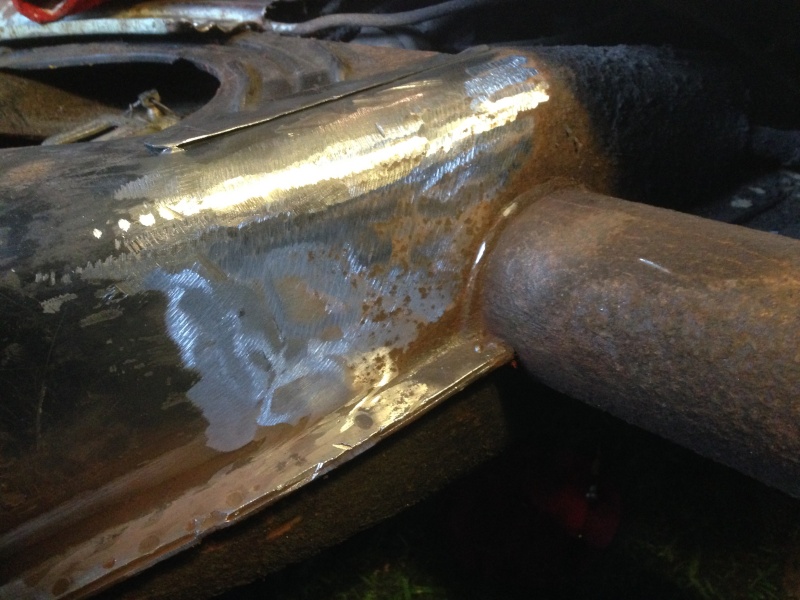 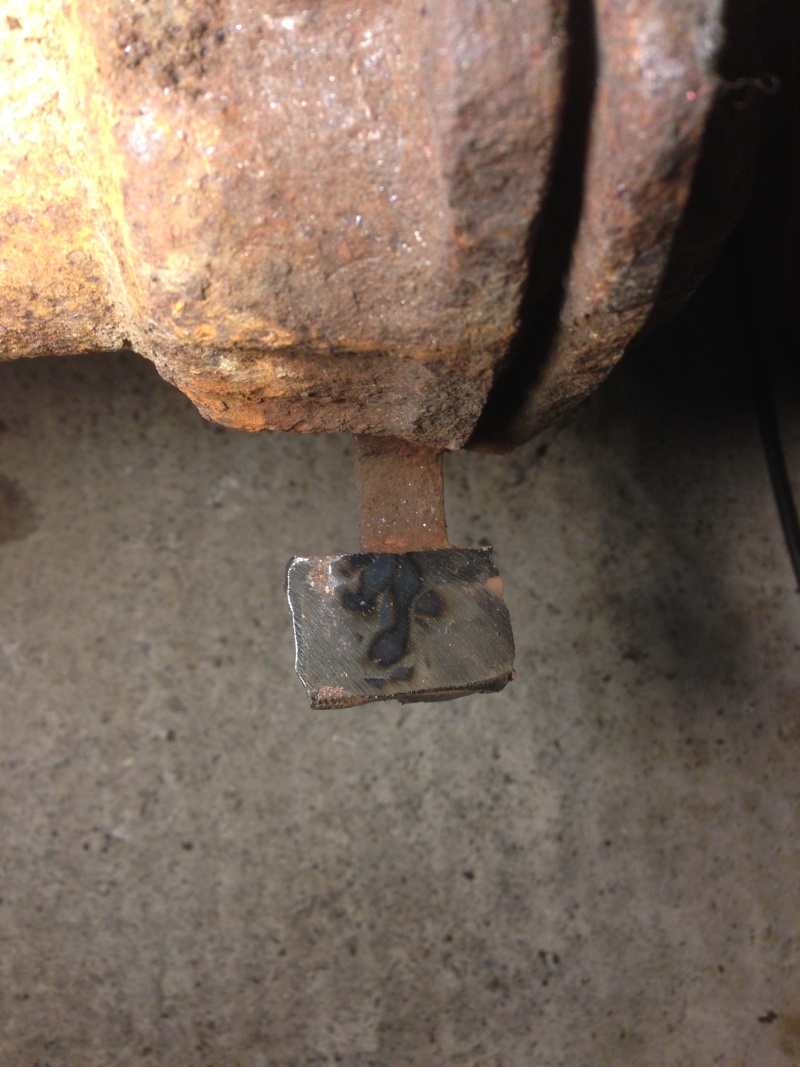 I tried test fitting the new floor plate, X member and floor pan. Had a little issue with the pan not fittng eactly due to the floor plate. | |
|
  | |
whitebrow83
Blitzen Regular

 Number of posts : 126 Number of posts : 126
Age : 41
Registration date : 2013-05-22
 |  Subject: Re: Whitebrow's 65 Bug Full Restoration Subject: Re: Whitebrow's 65 Bug Full Restoration  Sat Dec 07, 2013 6:32 pm Sat Dec 07, 2013 6:32 pm | |
| Reading through jokers thread and his last comment I think ive done this slightly in the wrong order.
I should havewelded the x member to the boot floor first, drilled the holes into the floor plate and the removed the floor plate.
Although with the x member there it would have made it difficult to remove the plate. | |
|
  | |
joker 67
DBS Old Timer


 Number of posts : 3498 Number of posts : 3498
Age : 54
Location : Clevedon
My Ride(s) : 2018 Skoda Karoq edition and something else
Registration date : 2008-02-11
 |  Subject: Re: Whitebrow's 65 Bug Full Restoration Subject: Re: Whitebrow's 65 Bug Full Restoration  Sun Dec 08, 2013 9:30 am Sun Dec 08, 2013 9:30 am | |
| It is so you can line it all up properly.
I told you don't cut too much out in one go. | |
|
  | |
joker 67
DBS Old Timer


 Number of posts : 3498 Number of posts : 3498
Age : 54
Location : Clevedon
My Ride(s) : 2018 Skoda Karoq edition and something else
Registration date : 2008-02-11
 |  Subject: Re: Whitebrow's 65 Bug Full Restoration Subject: Re: Whitebrow's 65 Bug Full Restoration  Sun Dec 08, 2013 9:32 am Sun Dec 08, 2013 9:32 am | |
| The little tab on the rear torsion bar for floor weld, just make sure you clean all the old panel off correctly, and don't hit it too hard as it's cast so will break off. | |
|
  | |
Big_Al
DBS Old Timer


 Number of posts : 3616 Number of posts : 3616
Age : 51
Location : Under The Thumb.
My Ride(s) : 1970 looker, 2009 T5 'The Night Fury!', 2006 Challenger 3 tank (wife's)!
Registration date : 2008-02-05
 |  Subject: Re: Whitebrow's 65 Bug Full Restoration Subject: Re: Whitebrow's 65 Bug Full Restoration  Sun Dec 08, 2013 11:25 am Sun Dec 08, 2013 11:25 am | |
| - joker 67 wrote:
- It is so you can line it all up properly.
I told you don't cut too much out in one go. QFT. | |
|
  | |
whitebrow83
Blitzen Regular

 Number of posts : 126 Number of posts : 126
Age : 41
Registration date : 2013-05-22
 |  Subject: Re: Whitebrow's 65 Bug Full Restoration Subject: Re: Whitebrow's 65 Bug Full Restoration  Sun Dec 08, 2013 4:09 pm Sun Dec 08, 2013 4:09 pm | |
| Its all good now, ive taken 4 measurements and compare them all to the original o/s plate and it all lines up perfectly. False alarm!  Ive also cleaned up the little tab which appears to be oval in shape. | |
|
  | |
tango_van
DBS Old Timer


 Number of posts : 2846 Number of posts : 2846
Age : 42
Location : Wsm
My Ride(s) : 1972 Westy Camper Van, 09 Newbie 1.9tdi, Audi A4 B7 S-line
Registration date : 2006-10-11
 |  Subject: Re: Whitebrow's 65 Bug Full Restoration Subject: Re: Whitebrow's 65 Bug Full Restoration  Mon Dec 16, 2013 10:20 pm Mon Dec 16, 2013 10:20 pm | |
| Craig... You still alive or have you welded yourself into the pan? | |
|
  | |
whitebrow83
Blitzen Regular

 Number of posts : 126 Number of posts : 126
Age : 41
Registration date : 2013-05-22
 |  Subject: Re: Whitebrow's 65 Bug Full Restoration Subject: Re: Whitebrow's 65 Bug Full Restoration  Tue Dec 17, 2013 4:35 pm Tue Dec 17, 2013 4:35 pm | |
| Help!!! I've been stuck here for weeks  Nah just kicking my ex out the house so I can fit more Beetle parts lol On a serious note. I havent done anything and have a pan drilled and ready to weld along with a x member and the o/s pan to prep. Got a few weeks off over Christmas so will aim to weld then. | |
|
  | |
WizBizMartin
DBS Old Timer


 Number of posts : 2531 Number of posts : 2531
Age : 33
Location : W-S-M
My Ride(s) : 85 Mexican Beetle, 20v T Beetle, Honda Xr125
Registration date : 2008-11-27
 |  Subject: Re: Whitebrow's 65 Bug Full Restoration Subject: Re: Whitebrow's 65 Bug Full Restoration  Wed Dec 18, 2013 9:12 am Wed Dec 18, 2013 9:12 am | |
| | |
|
  | |
whitebrow83
Blitzen Regular

 Number of posts : 126 Number of posts : 126
Age : 41
Registration date : 2013-05-22
 |  Subject: Re: Whitebrow's 65 Bug Full Restoration Subject: Re: Whitebrow's 65 Bug Full Restoration  Wed Dec 18, 2013 9:24 am Wed Dec 18, 2013 9:24 am | |
| My last day is today and im not back until the 6th! FUCK YEAH! | |
|
  | |
WizBizMartin
DBS Old Timer


 Number of posts : 2531 Number of posts : 2531
Age : 33
Location : W-S-M
My Ride(s) : 85 Mexican Beetle, 20v T Beetle, Honda Xr125
Registration date : 2008-11-27
 |  Subject: Re: Whitebrow's 65 Bug Full Restoration Subject: Re: Whitebrow's 65 Bug Full Restoration  Mon Jan 20, 2014 1:58 pm Mon Jan 20, 2014 1:58 pm | |
| craig has been too busy playing with his small willy rather than his welder | |
|
  | |
whitebrow83
Blitzen Regular

 Number of posts : 126 Number of posts : 126
Age : 41
Registration date : 2013-05-22
 |  Subject: Re: Whitebrow's 65 Bug Full Restoration Subject: Re: Whitebrow's 65 Bug Full Restoration  Mon Jan 20, 2014 3:24 pm Mon Jan 20, 2014 3:24 pm | |
| I've been on too many dates and now I have a frayed stump! lol No more dates after this weekend and back on the bug. I've also decided to admit defeat and just send the body off to get it all done professionally as theres just too much to do. My wallets going to look like my last dates wizards sleeve but at least there's a good chance it'll be done this year.  | |
|
  | |
tango_van
DBS Old Timer


 Number of posts : 2846 Number of posts : 2846
Age : 42
Location : Wsm
My Ride(s) : 1972 Westy Camper Van, 09 Newbie 1.9tdi, Audi A4 B7 S-line
Registration date : 2006-10-11
 |  Subject: Re: Whitebrow's 65 Bug Full Restoration Subject: Re: Whitebrow's 65 Bug Full Restoration  Mon Jan 20, 2014 8:39 pm Mon Jan 20, 2014 8:39 pm | |
| - Big_Al wrote:
- joker 67 wrote:
- It is so you can line it all up properly.
I told you don't cut too much out in one go. QFT. this rings a bell... looking forward to seeing it sorted.. you sending it to TODS? | |
|
  | |
whitebrow83
Blitzen Regular

 Number of posts : 126 Number of posts : 126
Age : 41
Registration date : 2013-05-22
 |  Subject: Re: Whitebrow's 65 Bug Full Restoration Subject: Re: Whitebrow's 65 Bug Full Restoration  Mon Jan 20, 2014 8:47 pm Mon Jan 20, 2014 8:47 pm | |
| Shut it house bender! It just needs to be sorted and ive got alot of freelance work on recently that will fund it. yeah should be going in to TODS if they have room for it when its ready. Im going to weld the x members and pans in first though and provide them the whole car. The idea is that they then work on the heater channels and anything else they need to have the chassis for and then i'll have the chassis back to break down furnther, and sand blast. Will need your help Rich with brakes and rear swing arm.  | |
|
  | |
vietnam
DBS Old Timer


 Number of posts : 1671 Number of posts : 1671
Age : 35
Location : Bleadon
My Ride(s) : 07 Golf, t25 devon
Registration date : 2011-01-04
 |  Subject: Re: Whitebrow's 65 Bug Full Restoration Subject: Re: Whitebrow's 65 Bug Full Restoration  Mon Jan 20, 2014 9:11 pm Mon Jan 20, 2014 9:11 pm | |
| Enjoy the wait, spence has got my fasty to sort out next week! | |
|
  | |
Sponsored content
 |  Subject: Re: Whitebrow's 65 Bug Full Restoration Subject: Re: Whitebrow's 65 Bug Full Restoration  | |
| |
|
  | |
| | Whitebrow's 65 Bug Full Restoration |  |
|
